Help: User's Guide: Regions
Users may create and manage user defined regions from the right-side Regions panel in Acquisition Forecaster, Coincident Calculator, Coverage Analyzer, Revisits Calculator, and Data Browser tools. User defined regions should be created/managed while logged into a COVE user account. Once created user regions will appear in the region selection drop down list in the missions and instruments panel on the left side of COVE.
Viewing regions on the map
Regions and user defined regions may be viewed on the map by selecting a region from the region selection drop down list on in the missions and instruments panel of COVE, or by selecting an option from the regions list in the Regions panel on the right side of COVE. COVE will zoom in on the map to the region selected.
Creating user defined regions
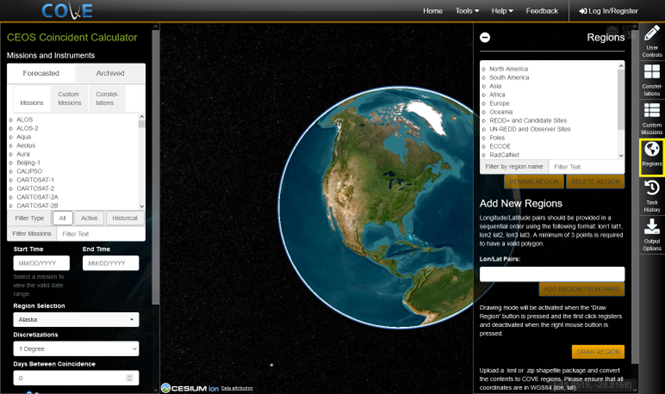
Users may add new regions to COVE from the right-side Regions panel. The custom region will appear under the heading User Regions in the region selection list in the right-side regions panel and in the left-side missions and instruments panel. Regions may be added by:
- Longitude/Latitude pairs: Longitude/Latitude pairs should be provided in a sequential order using the following format: lon1 lat1, lon2 lat2, lon3 lat3. A minimum of 3 points is required to have a valid polygon. Enter the lon/lat pairs in the space provided and click on the "Add Region From Pairs" button to save.
- Draw Region: Drawing mode will be activated when the 'Draw Region' button is pressed. The first click registers and deactivated when the right mouse button is pressed.
- KML: Upload a .kml to convert the contents to COVE regions. Please ensure that all coordinates are in WGS84 (lon, lat). KML may contain multiple regions. The region name is derived from the name tag within placemark and coordinates tags.
- Shapefile: Upload a .zip shapefile package to convert the contents to COVE regions. Please ensure that all coordinates are in WGS84 (lon, lat). Shapefiles must contain shp and dbf files in the root of the ZIP file. Shapefiles may contain multiple regions. The region name is derived from the dbf file from a column from one of the following header lists with precidence from left to right: NAME, COUNTRY, STATE, PROVINCE, CITY, PLACE, or REGION. If no column exists in the dbf file with a header from the list, the region name is derived from the ZIP file name.
Managing user defined regions
Users may manage user defined regions from the right-side regions panel. Only user defined regions listed under the User Regions heading can be renamed or deleted.
To rename a user defined region, select a user region from the list, and click the "Rename Region" button. A popup will appear asking for a new name for the region. Click the OK button to save the new region name. Click cancel to return to COVE without renaming the region.
To delete a user defined region, select a user region from the list, and click the "Delete Region" button. A popup will appear to confirm deletion of the region selected. Click the Delete button to permanently delete the region. Click cancel to return to COVE without deleting the region.